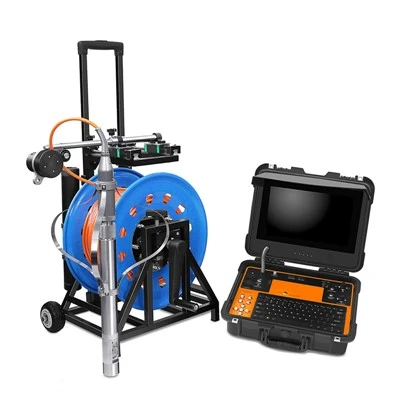
Hey there! As a supplier of Down Hole Cameras, I've had my fair share of experiences dealing with the ins and outs of these nifty gadgets. One of the most common questions I get from customers is how to adjust the focus of a down hole camera. Well, you're in luck because I'm gonna break it down for you in this blog post.
First things first, let's talk about why focus adjustment is so important. A down hole camera is used to inspect the inside of wells, boreholes, and other underground structures. If the camera isn't focused properly, you won't be able to get clear and detailed images of what's going on down there. This can make it difficult to identify problems, such as cracks, leaks, or blockages, which can lead to costly repairs down the line.
Now, let's get into the nitty-gritty of how to adjust the focus of a down hole camera. The process can vary depending on the type of camera you have, but I'll cover the general steps here.
Step 1: Understand Your Camera
Before you start adjusting the focus, it's important to understand how your camera works. Read the user manual carefully to familiarize yourself with the different features and settings. Look for information on how to access the focus adjustment controls and what each setting does. Some cameras may have automatic focus, while others may require manual adjustment.
Step 2: Set Up the Camera
Once you understand your camera, it's time to set it up for use. Make sure the camera is properly connected to the power source and the display unit. Lower the camera into the well or borehole using the cable or wireline. Take your time to ensure that the camera is positioned correctly and that the lens is clean and free of debris.


Step 3: Find the Object of Interest
Before you start adjusting the focus, you need to find the object you want to inspect. This could be a pipe, a valve, or any other structure inside the well. Use the camera's pan and tilt controls to move the lens around and locate the object. Once you've found it, center it in the viewfinder.
Step 4: Adjust the Focus
Now it's time to adjust the focus. If your camera has automatic focus, simply press the focus button or select the auto focus option in the menu. The camera will automatically adjust the focus to the object of interest. If your camera has manual focus, you'll need to use the focus adjustment controls to fine-tune the focus.
Most down hole cameras have a focus ring or a focus button that you can use to adjust the focus. Turn the focus ring clockwise or counterclockwise to increase or decrease the focus. You can also use the focus button to make small adjustments. As you adjust the focus, keep an eye on the display unit to see how the image changes. Keep adjusting until the image is clear and sharp.
Step 5: Check the Focus
Once you've adjusted the focus, it's important to check it to make sure it's correct. Move the camera slightly and see if the image stays in focus. If the image becomes blurry, you may need to make further adjustments. You can also try taking a few test shots to see how the images look.
Step 6: Make Fine-Tuning Adjustments
If the focus still isn't perfect, you can make some fine-tuning adjustments. Some cameras have a zoom function that you can use to get a closer look at the object. This can help you to see more details and make more accurate focus adjustments. You can also try adjusting the lighting settings to improve the image quality.
Step 7: Save the Settings
Once you're happy with the focus settings, it's a good idea to save them. This will save you time and effort the next time you use the camera. Most cameras have a memory function that allows you to save the focus settings and other camera settings.
Tips and Tricks
Here are some tips and tricks to help you adjust the focus of your down hole camera more effectively:
- Use a tripod or a stabilizer to keep the camera steady. This will help to prevent blurry images and make it easier to adjust the focus.
- Clean the lens regularly to ensure that it's free of debris and dirt. This will help to improve the image quality and make it easier to adjust the focus.
- Use the zoom function sparingly. While zooming in can help you to see more details, it can also make the image quality worse. Try to use the zoom function only when necessary.
- Take your time and be patient. Adjusting the focus of a down hole camera can take some practice, so don't get frustrated if it doesn't work perfectly the first time.
Conclusion
Adjusting the focus of a down hole camera is an important skill that every user should master. By following the steps outlined in this blog post and using the tips and tricks provided, you should be able to adjust the focus of your camera quickly and easily. Remember to read the user manual carefully and to practice adjusting the focus on different objects to get the hang of it.
If you're in the market for a down hole camera, we've got a great selection of cameras to choose from. Check out our Deep Water Inspection Camera, Oil Well Inspection Camera, and Drilling Inspection Camera. These cameras are designed to provide clear and detailed images of the inside of wells and boreholes, making them ideal for a variety of applications.
If you have any questions or need further assistance, don't hesitate to contact us. We're here to help you find the right camera for your needs and to provide you with the support and training you need to use it effectively.
References
- Manufacturer's user manuals for down hole cameras
- Industry best practices for down hole camera operation and maintenance