How to adjust the settings of a push rod camera?
As a seasoned supplier of push rod cameras, I understand the importance of getting the settings right for optimal performance. Push rod cameras are invaluable tools for inspecting pipes, sewers, and other hard - to - reach areas. In this blog, I'll guide you through the process of adjusting the settings of a push rod camera, ensuring you get the most out of your equipment.
1. Understanding the Basics of a Push Rod Camera
Before we delve into the settings, it's essential to have a basic understanding of what a push rod camera is. A push rod camera, also known as a Push Sewer Inspection Camera, consists of a camera head attached to a flexible rod. The camera head is usually equipped with lights, and it can be pushed through pipes to capture images and videos of the interior.
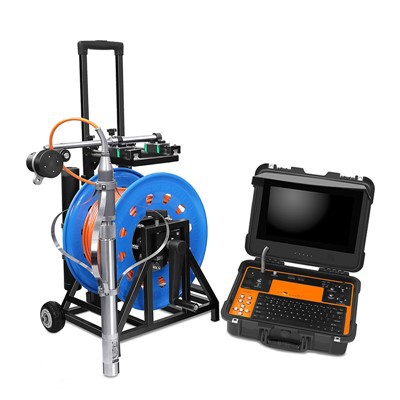
The main components of a push rod camera system include the camera head, the push rod itself, a monitor for viewing the footage, and a control unit for adjusting the settings. Some advanced models, like the 33mm FHD 120m Pan Tilt Rotation Sewer Push Rod CCTV Camera with Manual Focus Function, offer additional features such as pan - tilt rotation and manual focus.
2. Power and Initial Setup
The first step in adjusting the settings of a push rod camera is to power on the system. Connect the camera head to the control unit and the monitor. Make sure all the cables are securely plugged in. Once the system is powered on, you'll see the camera's view on the monitor.
At this stage, check the battery level if your camera is battery - powered. Low battery can cause the camera to malfunction or provide inconsistent performance. If you're using an external power source, ensure that it's providing the correct voltage.
3. Image and Video Quality Settings
Resolution
Most modern push rod cameras offer different resolution options. Higher resolutions, such as Full HD (1920x1080), provide clearer and more detailed images. However, higher resolutions also require more storage space and may put a strain on the camera's processing power. If you're mainly using the camera for general inspections, a lower resolution may be sufficient. To adjust the resolution, navigate to the settings menu on the control unit and select the desired option.
Brightness and Contrast
The brightness and contrast settings are crucial for getting clear and visible images, especially in dark or poorly lit pipes. If the image on the monitor is too dark, increase the brightness. If the image lacks definition, adjust the contrast. You can usually find these settings in the image adjustment section of the control unit's menu.
Color Saturation
Color saturation determines how vivid the colors in the image appear. In some cases, you may want to increase the color saturation to make certain features more distinguishable. However, too much saturation can make the image look unnatural. Experiment with different saturation levels to find the right balance for your inspection needs.
4. Focus Adjustment
Manual focus is a valuable feature, especially in CCTV Pipe Inspection Camera systems. If your camera has a manual focus function, you can adjust the focus to get a sharp image of the object you're inspecting. This is particularly useful when you need to examine small details or objects at different distances within the pipe.
To adjust the focus, look for the focus control on the control unit. You may need to turn a dial or use a button to move the focus in and out until the image is clear. Some cameras also offer autofocus, which can be convenient for quick inspections. However, in situations where precision is required, manual focus is often the better option.
5. Camera Orientation and Angle
Pan and Tilt
If your push rod camera has a pan - tilt function, you can adjust the camera's orientation and angle to get a better view of the pipe's interior. The pan function allows you to rotate the camera horizontally, while the tilt function lets you move it vertically. Use the controls on the control unit to pan and tilt the camera as needed. This is useful for inspecting different sides of the pipe or looking around corners.
Rotation
Some cameras also offer a rotation function, which allows you to spin the camera head 360 degrees. This can be extremely helpful when you need to get a complete view of the pipe's circumference. Adjust the rotation speed according to your inspection requirements. A slower speed may be better for detailed inspections, while a faster speed can be used for a quick overview.
6. Recording and Storage Settings
Recording Mode
Most push rod cameras support both video and photo recording. Decide whether you want to record a continuous video or take individual photos during the inspection. You can usually select the recording mode from the settings menu on the control unit.
Storage Location
Determine where you want to store the recorded footage and photos. Some cameras have built - in storage, while others allow you to use an external memory card. If you're using an external memory card, make sure it has enough space and is properly inserted into the camera.
7. Calibration and Testing
After adjusting all the settings, it's important to calibrate the camera and conduct a test run. Calibration ensures that the camera's sensors and controls are working accurately. Follow the manufacturer's instructions for calibration, which may involve adjusting the camera's internal settings or using a calibration target.


Once the camera is calibrated, test it in a pipe or a similar environment. Check the image quality, focus, and orientation to make sure everything is working as expected. If you notice any issues, go back to the settings and make further adjustments.
8. Maintenance and Troubleshooting
Regular maintenance is essential for keeping your push rod camera in good working condition. Clean the camera head and the push rod after each use to remove any dirt or debris. Check the cables for any signs of damage and replace them if necessary.
If you encounter any problems with the camera, such as a blurry image or a malfunctioning control, refer to the user manual for troubleshooting tips. In some cases, you may need to contact the manufacturer's customer support for further assistance.
Conclusion
Adjusting the settings of a push rod camera is a crucial step in ensuring accurate and effective inspections. By understanding the different settings and how they work, you can optimize the camera's performance for your specific needs. Whether you're inspecting sewers, pipes, or other hard - to - reach areas, a well - adjusted push rod camera can provide clear and detailed images that help you make informed decisions.
If you're interested in purchasing a high - quality push rod camera or need further advice on camera settings and usage, feel free to reach out to us. We're here to assist you in finding the right solution for your inspection requirements.
References
- Manufacturer's user manuals for push rod cameras
- Industry standards and best practices for pipe inspection using push rod cameras