


Hey there! As a supplier of Deep Well Camera Systems, I get a ton of questions about how to connect these nifty gadgets to a computer. It's actually not as complicated as it might sound, and I'm here to walk you through the whole process step by step.
First off, let's talk a bit about why you'd want to connect your Deep Well Camera System to a computer. Well, it's all about getting the most out of your camera's data. When you connect it to a computer, you can view the live feed, record the footage for later analysis, and even use software to enhance the images and measure distances. It's a game - changer for anyone doing borewell inspections, water well maintenance, or any other deep - well related work.
What You'll Need
Before we dive into the connection process, you need to gather a few things.
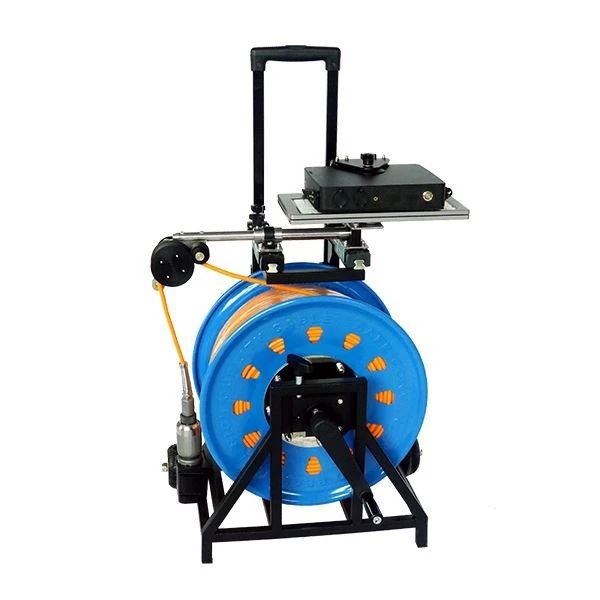
- Deep Well Camera System: This is the star of the show. We offer a range of systems, like the Borewell Inspection Camera, which is perfect for getting a clear view inside borewells. There's also the 45mm Rotation Portable Borehole Video Camera System 50Mtr, great for on - the - go inspections. And the Water Well Inspection Camera is ideal for water well assessments.
- Computer: It can be a desktop or a laptop. Make sure it has an available USB port or the appropriate connection port depending on your camera system.
- Power Source: The camera system usually needs power. Some come with their own battery packs, while others might need to be plugged into an external power supply.
- Software (if required): Some camera systems come with their own software that you need to install on your computer to view and manage the footage.
Step 1: Check Your Camera System
The first thing you want to do is give your Deep Well Camera System a good once - over. Make sure all the components are in working order. Check the cables for any signs of damage, and ensure the camera lens is clean. If your camera has a battery, make sure it's fully charged or connect it to a power source.
Step 2: Prepare Your Computer
If your camera system requires software, head over to the manufacturer's website and download the appropriate software. Install it on your computer following the on - screen instructions. It's usually a pretty straightforward process, but if you run into any issues, don't hesitate to reach out to our support team.
Step 3: Connect the Camera to the Computer
Now comes the fun part. Take the cable that came with your camera system and connect one end to the camera and the other end to the appropriate port on your computer. If it's a USB connection, just plug it in. You might hear a beep or see a notification on your computer indicating that a new device has been detected.
Step 4: Launch the Software (if applicable)
Once the camera is connected, open the software you installed earlier. The software should automatically detect the camera and start displaying the live feed. If it doesn't, check the settings in the software to make sure it's set to the correct camera input.
Step 5: Adjust the Settings
Now that you're seeing the live feed, you can start adjusting the settings to get the best possible view. You can change the brightness, contrast, and focus of the camera. Some software also allows you to take snapshots or start recording the footage.
Step 6: Troubleshooting
Sometimes, things don't go as smoothly as we'd like. If you're having trouble getting the camera to connect or the software isn't working, here are a few things you can try:
- Check the cables: Make sure they're properly connected and not damaged.
- Restart the camera and the computer: Sometimes, a simple restart can fix a lot of issues.
- Update the software: Check the manufacturer's website for any software updates.
- Contact support: If all else fails, give our support team a shout. We're here to help you get your system up and running.
Tips for a Successful Connection
- Keep it clean: Make sure the camera lens and the connection ports on both the camera and the computer are clean. Dust and debris can interfere with the connection.
- Use a stable power source: A fluctuating power supply can cause the camera to malfunction.
- Test before you go: Before you head out to the field, test the connection in a controlled environment to make sure everything is working properly.
Conclusion
Connecting your Deep Well Camera System to a computer is a great way to get the most out of your investment. It allows you to view, record, and analyze the footage, making your borewell and water well inspections more efficient and accurate. If you have any questions or need further assistance, don't hesitate to reach out. We're here to help you with all your Deep Well Camera System needs.

If you're interested in purchasing a Deep Well Camera System or have any questions about our products, feel free to contact us. We'd love to have a chat and discuss how our systems can meet your specific requirements.
References
- Manufacturer's manual for Deep Well Camera Systems
- Technical support documentation provided by the camera system supplier


