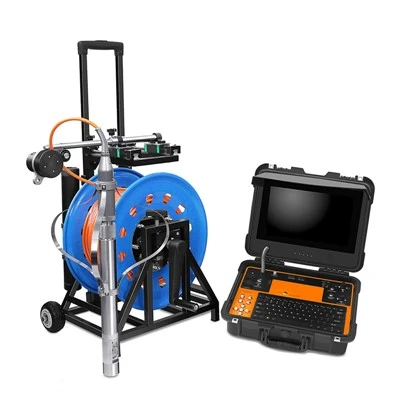
Calibrating pushrod cameras is a crucial process that ensures accurate and reliable inspection results. As a trusted pushrod cameras supplier, we understand the significance of proper calibration in maintaining the performance of these essential inspection tools. In this blog, we will delve into the step - by - step process of calibrating pushrod cameras, highlighting key considerations and best practices.
Why Calibration is Necessary
Pushrod cameras are commonly used in various industries, such as plumbing, sewer inspection, and industrial pipeline assessment. These cameras are designed to provide clear visual information about the interior of pipes, ducts, and other confined spaces. However, over time, factors like mechanical stress, temperature variations, and normal wear and tear can affect the camera's performance. Calibration helps to correct any inaccuracies in the camera's image, color representation, and measurement capabilities, ensuring that the inspection data collected is precise and trustworthy.
Pre - calibration Checks
Before starting the calibration process, it is essential to perform a series of pre - calibration checks. First, visually inspect the pushrod camera for any physical damage, such as cracks in the lens or cable abrasions. A damaged camera may not calibrate correctly and could lead to inaccurate inspection results. Next, check the camera's power supply and make sure it is functioning properly. A weak or unstable power source can cause erratic behavior during calibration.
It is also important to clean the camera lens thoroughly. Dust, dirt, or fingerprints on the lens can distort the image and affect the calibration process. Use a soft, lint - free cloth and a suitable lens cleaning solution to gently clean the lens.
Calibration Steps
1. Image Focus and Clarity
The first step in calibrating a pushrod camera is to adjust the image focus and clarity. Start by placing the camera in a well - lit environment with a clear, high - contrast target. This could be a printed test pattern or a simple black - and - white object. Connect the camera to a monitor or a display device and power it on.
Use the camera's focus adjustment mechanism, which may be a manual dial or an automatic focusing feature, to bring the target into sharp focus. Observe the image on the monitor and make fine adjustments until the edges of the target are crisp and well - defined. Some advanced pushrod cameras, like our Push Rod Camera, come with autofocus capabilities that simplify this process.


2. Color Calibration
Color calibration is essential for accurate visual inspection. Incorrect color representation can make it difficult to identify different materials or signs of damage inside the pipes. To calibrate the color, use a color calibration chart. Place the chart in the camera's field of view and ensure it is evenly lit.
On the camera's control panel or software, locate the color calibration settings. These settings may include options for adjusting the hue, saturation, and brightness. Compare the colors on the monitor with the actual colors on the calibration chart and make adjustments until they match as closely as possible. This step ensures that the colors in the inspection images are true to life, allowing for better interpretation of the data.
3. Distance and Size Measurement Calibration
Many pushrod cameras are equipped with distance and size measurement capabilities, which are invaluable for assessing the dimensions of pipes, cracks, or other objects inside the pipes. To calibrate these measurements, use a known - length reference object. This could be a calibrated ruler or a pipe section of a known diameter.
Place the reference object in the camera's field of view and use the camera's measurement function to measure its length or diameter. Compare the measured value with the actual value of the reference object. If there is a discrepancy, adjust the measurement calibration settings on the camera. This may involve entering a calibration factor or adjusting the measurement scale until the measured values are accurate.
Our Pipe Camera System offers advanced measurement calibration features that make this process more precise and efficient.
4. Pan and Tilt Calibration
For pushrod cameras with pan and tilt capabilities, calibration of these functions is necessary to ensure smooth and accurate movement. Start by placing the camera in a stable position and power it on. Use the camera's control device to pan and tilt the camera head.
Check for any jerky or uneven movement. If the movement is not smooth, there may be an issue with the camera's motor or mechanical components. Some cameras allow for adjustment of the pan and tilt speed and sensitivity. Make these adjustments as needed to ensure that the camera moves smoothly and accurately in all directions.
Post - calibration Verification
After completing the calibration process, it is important to verify the results. Repeat the pre - calibration checks and the calibration steps to ensure that the camera is still performing accurately. Take a series of test images and measurements in different environments and compare them with known values or reference standards.
If any discrepancies are found, repeat the calibration process until the camera meets the required accuracy standards. It is also a good practice to document the calibration process, including the settings used and the results obtained. This documentation can be useful for future reference and for demonstrating compliance with quality control standards.
Maintenance Tips for Keeping Calibration
To maintain the accuracy of the pushrod camera calibration over time, regular maintenance is essential. Store the camera in a clean, dry environment when not in use to prevent dust and moisture from affecting its performance.
Periodically check the camera's cables and connectors for signs of wear or damage. Loose or damaged cables can cause signal interference, which can affect the calibration. Replace any damaged components immediately.
It is also recommended to perform a calibration check at regular intervals, such as once every few months or after a certain number of inspection hours. This proactive approach helps to ensure that the camera is always in optimal working condition.
Conclusion
Calibrating pushrod cameras is a multi - step process that requires attention to detail and precision. By following the steps outlined in this blog, you can ensure that your pushrod camera provides accurate and reliable inspection results. As a leading pushrod cameras supplier, we offer a range of high - quality cameras, including our 120m Push Camera, which are designed for easy calibration and long - term performance.
If you are in the market for pushrod cameras or need further assistance with calibration, we encourage you to contact us for a procurement discussion. Our team of experts is ready to help you find the right camera for your specific needs and provide you with the support you need to keep your inspection operations running smoothly.
References
- "Handbook of Pipeline Inspection Technologies" - This comprehensive handbook provides in - depth information on various pipeline inspection tools, including pushrod cameras, and their calibration procedures.
- Manufacturer's Manuals - The user manuals of pushrod cameras contain detailed instructions on calibration and maintenance, specific to each model.