Installing a 100 ft sewer camera can be a game - changer for plumbing professionals and DIY enthusiasts alike. As a supplier of 100 ft sewer cameras, I've seen firsthand the benefits these tools bring to the table. In this blog post, I'll guide you through the step - by - step process of installing a 100 ft sewer camera, ensuring you get the most out of your investment.
Pre - installation Preparation
Before you start the installation process, it's crucial to gather all the necessary tools and equipment. You'll need a tape measure, a screwdriver set (both flat - head and Phillips), a power drill, and safety gear such as gloves and safety glasses. Additionally, make sure to review the user manual that comes with your sewer camera. This manual contains specific instructions and safety guidelines for your particular model.
It's also a good idea to assess the sewer system you'll be working on. Look for any visible signs of damage, blockages, or unusual features. This preliminary inspection will help you anticipate any challenges you might face during the installation.
Step 1: Choose the Right Access Point
The first step in installing a 100 ft sewer camera is to select the appropriate access point. This is typically a cleanout or a manhole. Cleanouts are usually located near the foundation of a building and are designed to provide easy access to the sewer line. Manholes, on the other hand, are larger access points commonly found in municipal sewer systems.
When choosing an access point, make sure it is large enough to accommodate the camera head and the cable. You may need to remove a cap or cover to gain access. Use caution when removing these covers, as they can be heavy and may be stuck due to dirt and debris.
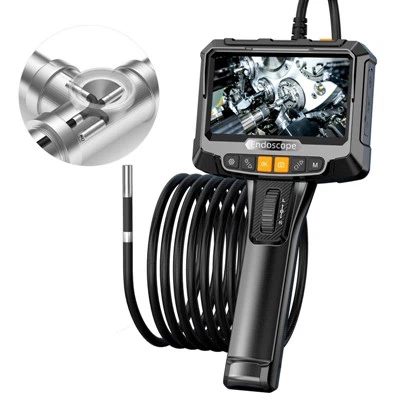
Step 2: Prepare the Camera
Once you've chosen the access point, it's time to prepare the sewer camera. Start by checking the camera head for any damage or debris. Clean the lens with a soft, dry cloth to ensure clear visibility. Next, inspect the cable for any signs of wear or damage. If you notice any frayed wires or cuts in the cable, do not use the camera until it has been repaired or replaced.
Connect the camera to the monitor or recording device according to the manufacturer's instructions. Make sure all connections are secure and that the power supply is working properly. You can refer to the Sewer Camera Systems page on our website for more information on compatible camera systems.
Step 3: Insert the Camera into the Sewer Line
With the camera prepared, it's time to insert it into the sewer line. Carefully lower the camera head into the access point, making sure it is centered and does not get caught on the edges. Slowly feed the cable into the line, paying close attention to the monitor to ensure the camera is moving smoothly.
As you insert the camera, be aware of any bends or turns in the sewer line. You may need to use a guide or a push rod to help navigate the camera around these obstacles. If you encounter a blockage, do not force the camera through it. Instead, try to determine the cause of the blockage and take appropriate action.
Step 4: Navigate the Sewer Line
Once the camera is in the sewer line, you can start navigating it to the desired location. Use the controls on the monitor to pan, tilt, and zoom the camera. This will allow you to get a detailed view of the sewer line's interior.
As you navigate the camera, look for any signs of damage, such as cracks, leaks, or root intrusion. You can also look for blockages, debris, or other issues that may be affecting the sewer system. The Sewer Video Camera Inspection page on our website provides more information on what to look for during an inspection.
Step 5: Retrieve the Camera
After you've completed the inspection, it's time to retrieve the camera. Slowly pull the cable back out of the sewer line, making sure to keep it straight and avoid tangling. As you retrieve the camera, clean the cable and the camera head to remove any dirt or debris.
Once the camera is out of the sewer line, disconnect it from the monitor and store it in a safe place. Make sure to follow the manufacturer's instructions for proper storage to ensure the longevity of the camera.
Step 6: Analyze the Results
After retrieving the camera, it's time to analyze the results of the inspection. Review the recorded footage or images on the monitor or a computer. Look for any signs of damage or issues that were identified during the inspection.
If you're a plumbing professional, you can use this information to develop a repair plan for your client. If you're a DIY enthusiast, you can use the information to determine if you need to call a professional plumber. The Plumbing Video Camera Inspection page on our website offers more insights on interpreting inspection results.
Troubleshooting Tips
During the installation and inspection process, you may encounter some common issues. Here are some troubleshooting tips to help you overcome these challenges:
- Poor Image Quality: If the image on the monitor is blurry or distorted, check the camera lens for dirt or debris. Clean the lens and make sure it is properly focused. You may also need to adjust the lighting settings on the camera.
- Cable Tangling: If the cable gets tangled, stop feeding it into the sewer line immediately. Carefully untangle the cable, making sure not to damage it. You may need to use a cable guide or a push rod to prevent future tangles.
- Blockages: If the camera encounters a blockage, do not force it through. Try to determine the cause of the blockage, such as a foreign object or tree roots. You can use a drain snake or a hydro - jetter to clear the blockage.
Conclusion
Installing a 100 ft sewer camera is a valuable skill that can save you time and money in the long run. By following the steps outlined in this blog post, you can ensure a successful installation and inspection of your sewer system.
If you're interested in purchasing a 100 ft sewer camera or have any questions about our products, we encourage you to contact us for a detailed discussion. Our team of experts is always ready to assist you in finding the right solution for your needs.


References
- Manufacturer's user manuals for sewer cameras
- Industry best practices for sewer camera installation and inspection