Hey there! As a supplier of borescope cameras, I often get asked about how to calibrate these nifty devices. Calibration is super important as it ensures that your borescope camera gives you accurate and reliable results. Whether you're using it for industrial inspections, pipe checks, or just some general peeking into hard-to-reach places, a well - calibrated borescope is a game - changer. So, let's dive right in and learn how to calibrate a borescope camera.


Why Calibration Matters
First off, let me tell you why calibration is such a big deal. A borescope camera is used to capture images and videos in tight spaces where you can't directly see. If it's not calibrated correctly, the images might be distorted, the colors could be off, or the measurements (if your borescope has a measuring function) will be inaccurate. This can lead to wrong diagnoses in industrial settings or missed problems in pipe inspections. For example, in an industrial environment, a mis - calibrated borescope might make a small crack look bigger or smaller than it actually is, which could have serious consequences for the safety and functionality of the equipment.
Pre - calibration Checks
Before you start the calibration process, there are a few things you need to do. First, check the physical condition of your borescope camera. Look for any signs of damage to the cable, the camera head, or the display unit. A damaged cable can cause signal interference, and a cracked camera head can affect the quality of the images.
Next, make sure the camera is clean. Dust, dirt, or smudges on the lens can distort the images. You can use a soft, lint - free cloth to gently clean the lens. Also, check the battery level. A low - battery borescope might not function properly during calibration, so it's best to start with a fully charged battery.
Calibration Steps for Image Quality
Now, let's get into the actual calibration process for image quality. Most modern borescope cameras have an auto - calibration feature, which is a great starting point. To use this, turn on your borescope and look for the auto - calibration option in the menu. Usually, it's marked clearly. Once you select it, the camera will adjust the focus, brightness, and color balance automatically.
However, auto - calibration might not always give you the best results. In that case, you'll need to do some manual calibration. Start with the focus. Find an object with clear edges, like a ruler or a printed grid. Place the borescope close to the object and use the focus adjustment buttons on the camera or the display unit. Keep adjusting until the edges are sharp and clear.
For brightness and contrast, you can look at a well - lit, evenly colored surface. Use the brightness and contrast controls to make sure the image isn't too bright or too dark and that the colors look natural. You might need to take a few test shots and adjust as you go.
Calibration for Measuring Functions
If your borescope camera has a measuring function, calibration is a bit more involved. First, you need to use a calibration target. This is usually a small object with known dimensions that comes with your borescope. Place the calibration target in the field of view of the borescope.
Then, follow the instructions in the user manual to enter the actual dimensions of the target into the camera's measuring system. The camera will then use this information to calibrate its measuring function. After that, you can measure other objects in the field of view, and the camera should give you accurate measurements.
Troubleshooting Calibration Issues
Sometimes, you might run into problems during the calibration process. If the auto - calibration doesn't work, try resetting the camera to its factory settings. This can often fix any software glitches that might be causing the issue.
If you're having trouble getting the right focus, check the distance between the camera and the object. Some borescope cameras have a minimum focusing distance, so make sure you're within the specified range.
If the color calibration is off, it could be due to the lighting conditions. Try using a different light source or adjusting the lighting in the area where you're doing the calibration.
Our Borescope Camera Range
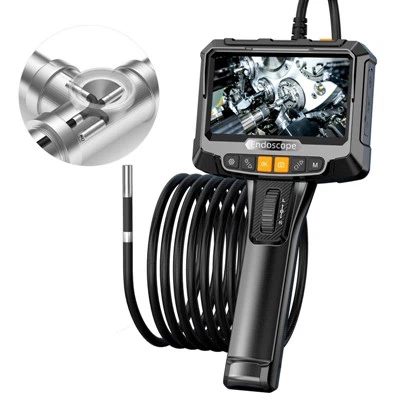
At our supply, we offer a wide range of borescope cameras to suit different needs. If you're looking for something portable, check out our Portable Endoscope Camera. It's great for on - the - go inspections and can easily fit into your toolbox.
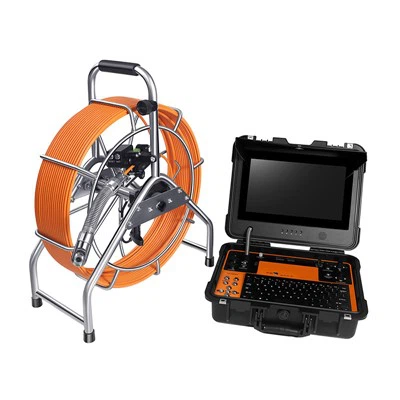
For pipe inspections, our Endoscope Pipe Inspection Camera is a top - notch choice. It's designed to withstand the harsh conditions inside pipes and can give you clear images of any blockages or damage.
And if you're in an industrial setting, our Industrial Endoscope Camera is built to handle tough jobs. It has high - resolution imaging and advanced measuring functions to help you with your inspections.
Conclusion and Call to Action
Calibrating a borescope camera might seem a bit complicated at first, but with a little practice, you'll get the hang of it. A well - calibrated borescope will give you accurate results, which is crucial for any inspection job.
If you're interested in purchasing a borescope camera or have any questions about calibration or our products, don't hesitate to reach out. We're here to help you find the right borescope for your needs and ensure that you can use it effectively.
References
- Manufacturer's user manuals for borescope cameras
- Industry standards for borescope camera calibration and use